
In 2024, How to Share Location in Messenger On Motorola Moto G34 5G? | Dr.fone
How to Share Location in Messenger On Motorola Moto G34 5G?
We usually host a gathering once in a while and invite our friends to come over. Most of us are already used to organizing such activities because we’ve been doing that for a long time now. However, we cannot deny that it’s much easier nowadays than years ago. Why so? Simply because the communication channels available today at our disposal are more digital and more capable. For instance, Facebook Messenger now allows users to share their whereabouts in a snap of a finger. Yes. That feature is called Live Location.
The Live Location feature on Messenger works beyond sending the address or coordinates of your exact location. It basically visualizes your whereabouts by means of an interactive map and updates the details from time to time. That means the receiver can view not only your position but also your movements. Is that helpful? Absolutely yes. It’s indeed a game-changer in today’s already convenient world. Is it highly recommended? With proper handling and adequate caution, Messenger’s Live Location can definitely do more good than harm to the users.
In this article, we will delve into the highlights and benefits of Facebook Messenger’s location-sharing features. We will also provide some tutorials on how to share Live Location on Messenger. Continue reading below to learn more.
Part 1. Everything You Should Know About Messenger’s Live Location
Facebook is well aware that sharing location details is essential to its users. That’s why developers have come up with a brilliant idea and rolled out Live Location on Messenger. It basically works like other location-sharing features. However, Live Location provides more precise and thorough location information. It’s in map form, where you can view the exact location and track the movements of the sender. You’ll continue to see updates for as long as the sharing is not halted on the other end. To navigate it properly, try to read tutorials on how to share Live Location on Messenger.

What if you wish to send a particular address from another location? There is no problem with that. Messenger allows users to search for a specific place, trace it on the map, and share the details. The receiver can view it in map form and get directions if necessary. See? It’s very easy and convenient. No need to type in long addresses just to share a particular location with your friend. You just have to find it precisely on the map and send the information afterward.
Convenience is just one thing. Messenger’s location-sharing feature has a lot more to offer to users. One of which is the accuracy of the shared location information. Since the details are automatically generated through GPS, you can be sure that it is correct and definite. If you go out and track it down the neighborhood, you can certainly find the location in no time. Just make sure that the location services on your smartphone are activated so you can view your progress in real time. Also, stay vigilant while you’re out and keep yourself safe from any harm. Remember that safety remains a priority and comes above convenience.
How to Grant Facebook Messenger the Permission to Access Your Location?
Facebook Messenger’s location-sharing feature will not work without the necessary access. That’s why you should first configure the permission settings on your mobile device to avoid unwanted disruptions. Don’t worry. It’s indeed a piece of cake. Check out the tutorial provided below.
- 1: Go to Settings.
- Step 2: Click Apps.

- Step 3: Find and click Messenger.

- Step 4: Click Permissions.

- Step 5: Click Location.

- Step 6: Select Allow Only While Using the App. If you’re quite conservative regarding this matter, click Ask Every Time instead. After that, Facebook Messenger will have access to your location information.

Part 2. How to Share My Location on Messenger?
How do I share my location on Messenger? As mentioned earlier, it’s very easy to use Facebook Messenger for location sharing. All it takes is just a few clicks on the platform. No need to manually type in the address or sketch the landmarks. Messenger does the rest of the work for you. In actuality, there are three ways to share your location on Messenger. Any of them can be of great help to you, depending on your current situation. Do you want to try them now? Check out the tutorials below.
Method 1: Share location on Facebook Messenger via Live Location
How to share my location on Messenger? Well, the first option you can try is through Live Location. It works best if you wish to tell somebody where exactly you are and give updates from time to time. Don’t worry. Although it looks complicated at a glance, in reality, it’s actually not rocket science. It only takes a few seconds to complete. Below is a tutorial on how to share Live Location on Messenger in easy steps.
- Step 1: Open the Facebook Messenger application on your mobile device.
- Step 2: Browse through your conversation feed and find the contact with whom you wish to share your Live Location. Click on it.
- Step 3: Click the More (+) icon at the bottom-left corner of the screen.

- Step 4: Right after, click Location.

- Step 5: Click Start Sharing Live Location. Immediately, your current location details will be available and forwarded to the intended receiver. Live Location lasts for 60 minutes at maximum. If you wish to terminate it, simply click Stop Sharing Live Location.

Method 2: Share location on Facebook Messenger via Pinned Location
Let’s say there is a specific place you want to visit with your friend. Is there a way to share the address of the venue without you being there at the moment? Fortunately, it is possible. Apart from sharing your current location in real-time via Live Location, you can also send pinned locations on Messenger. You just need to search for it and then redirect the details to your friend. Yes. It’s just as simple as that. Do you want to try it on your smartphone? If so, follow the guide below.
- Step 1: Launch the Facebook Messenger application on your mobile device.
- Step 2: Scroll through your conversations and find the receiver from the list. Click on it.
- Step 3: On the text field, click the More (+) icon at the bottom-left corner.
- Step 4: Then, click Location.
- Step 5: Locate the search bar above the interactive map and type in the location you want to share.

- Step 6: Choose one from the suggested results and then click on it. The details will then be forwarded immediately to the intended receiver.
Method 3: Share location on Facebook Messenger via Google Maps location
How do I share my location in Messenger if I cannot find it on the map provided? Yes. That happens sometimes. There are certain places that are untraceable on the messaging platform. As a result, it doesn’t appear on the map when you try to search for it. But don’t sweat it. If you experience the same issue, you can instead use Google Maps to share location details. How to do it? Check out the tutorial provided below.
- Step 1: Launch the Google Maps application on your mobile device.
- Step 2: Click on the Search bar at the top and then type in the location.

- Step 3: Choose one from the suggestions and then tap on it. Make sure that it is exactly what you’re looking for.

- Step 4: Access the menu bar below the map and then click Share.

- Step 5: From there, click Chats or the Facebook Messenger logo.
- Step 6: Find the receiver from the provided list and then click the Send button next to its name.

NOTE: Of course, you can only send pinned locations via Google Maps. The Facebook Messenger’s Live Location is available within the platform only.
BONUS TIP: Protect Your Privacy With Wondershare Dr.Fone
There’s no denying that the location-sharing feature of Facebook Messenger is useful to many of us. It always comes in very handy whenever we need to meet people somewhere or invite them to our places. However, we should not become too complacent and let our guard down. Sharing sensitive information like whereabouts always comes with risk, regardless of the platform and the intention. Therefore, make it a habit to protect your privacy at all costs. In this regard, Wondershare Dr.Fone has something special to offer. Its Virtual Location feature, capable of modifying and simulating your location records, can be of great help for you. Don’t worry. It’s very easy to use. Here’s a short guide for you.
- Step 1: Download Wondershare Dr.Fone from its official website. Right after, install it on your computer.
- Step 2: Launch the newly installed software on your desktop. Once it fully loads up, connect your smartphone using a data cable. Follow the on-screen instructions and perform the steps accordingly to ensure the connection between the two devices is stable enough to handle the succeeding operations.
- Step 3: Navigate to the left-side panel and then click Toolbox. On the main dashboard, click Virtual Location. Is it your first time using this feature? If so, allow Wondershare Dr.Fone to download additional resources. Don’t sweat it. It will only take a few minutes to complete.
- Step 4: Once the downloading process has concluded, Wondershare Dr.Fone - Virtual Location will automatically open on a separate window. From there, go to the top-right menu bar and then click Teleport Mode. It is the first icon that appears in the row.

- Step 5: Head over to the top-left corner and enter your desired location into the search bar. Choose one from the suggested results. After that, click the Enter icon.

- Step 6: The details regarding your chosen location will be displayed on the computer screen. Review the information and make sure that it is the specific location you’re looking for. Once confirmed, click Move Here to proceed.

- Step 7: Immediately, the location settings on your smartphone will be changed according to the inputs you have provided to Wondershare Dr.Fone. You can verify it by checking the current location registered on your Maps app. After confirming that your mobile device is now showing a different location, you can now start browsing without worrying about your location’s privacy.

NOTE: Resort to Wondershare Dr.Fone - Virtual Location if your internet browsing does not require you to provide your real address. If you wish to restore your original location settings, simply close the Wondershare Dr.Fone application and restart your smartphone.
Conclusion
Gone are the days when you had to write invitation cards manually and deliver them one by one. Nowadays, all you need to do is go online and use Messenger’s location-sharing feature. Have you already tried it? If not, you should take it into consideration and use it on your next agenda. Refer to the tutorial above on how to share Live Location on Messenger. It can certainly help you get started. How do I share my location on Messenger without physically being there? That’s simple. Use Messenger or Google Maps’s pinned location. Furthermore, download Wondershare Dr.Fone on your computer. Its Virtual Location feature, capable of modifying your location settings, can provide protection for your privacy. Just connect your Motorola Moto G34 5G to the computer and set it up from there.
How to Fix My Motorola Moto G34 5G Location Is Wrong
GPS navigation has changed a lot of the things that we do on a day-to-day basis. It has alleviated all the concerns that you would usually have before going to do an errand, visiting a new location, or going on a road trip with your friends. Instead of planning your route a few days in advance, you can find the safest route with just a few taps on your phone, giving you more time to focus on other things.
While using your phone to track your current location, you might have noticed that it is not showing you the correct location. It will confuse you but it does happen from time to time, and there will be fixes that you can do get to track properly. There are also multiple factors that you will need to consider when you encounter an issue where your phone has shown you a completely different location compared to where you are. We will talk about those possible issues and how you can fix them and get them to work properly again.
Part 1: Why is My Location Wrong on My Motorola Moto G34 5G?
As we have mentioned earlier, there are multiple reasons why your location is not being tracked accurately by your phone. We understand how crucial to ensure that the location is accurate, especially if you are using this to send someone something or if you plan to go somewhere.
Reason #1: The location services are disabled on your phone
The most basic common reason as to why your current location is wrong is that you could have disabled the GPS or location services on your phone.
Reason #2: Internet connectivity on your mobile is unstable
Another common issue as to why your location is wrong on your phone is that your mobile’s connectivity is unstable. This could be due to your mobile provider, or the location that you currently are in might not have any stable internet connection and is causing your location to be wrong.
Reason #3: Your mobile phone might not be updated
Another reason your phone has the incorrect location would be that your phone is updated to the latest software update. The software update will usually include fixes to the old software update’s bugs.
Reason #4: The “Location Services” might not be enabled for the application
If you have not enabled the application to use the GPS, then it will not show you the correct location. Make sure to check whether this application can access the “Location Services” by following the steps below.
Part 2: How to Fix Motorola Moto G34 5G Location Accuracy Issue?
Now that you know the possible causes of why you have an incorrect location, we will not share with you the fixes that you can do to get a more accurate location when you use your phone.
Option #1: Enable the “Location Services” on your phone
To fix the wrong location issue, you will need to check that your “Location Services” are turned on. You can enable the “Location Services” by following the steps below.
- Step 1: Go to “Settings” and choose “Privacy”.
- Step 2: After, you can look for “Location Services” and enable it.
Option #2: Update your iOS to the latest update
It is important to regularly update your phone with the recent software updates to prevent any inaccurate locations on your phone.
- Step 1: Go to “Settings” and look for “General”.
- Step 2: Look for “Software Update”, from there you will see whether you have the latest iOS. If your phone is not updated, then you can go ahead and update it.
Option #3: If you are using another application, make sure that the application is updated as well
Similar to your iOS, the application needs to also be updated, so double-check if the application needs to be updated as well. You can do this by going to the App Store and checking if the application needs to be updated and if it does, do update the app and you can retry tracking your location after.
Option #4: Enable the “Location Services” for your phone
Double-check if the location services are turned on on your phone so it will show you an accurate location.
- Step 1: Open the “Settings” on your phone and scroll down to look for “Privacy” then tap on it.
- Step 2: Next, click on “Location Services” and check to see whether the location is turned on. If it is turned on, turn it off and back on again.
Bonus Tip: Easy Way to Fake Your GPS Location on Motorola Moto G34 5G (NO Jailbreak)
Dr.Fone - Virtual Location
1-Click Location Changer for both iOS and Android
- Teleport from one location to another across the world from the comfort of your home.
- With just a few selections on your computer, you can make members of your circle believe you’re anywhere you want.
- Stimulate and imitate movement and set the speed and stops you take along the way.
- Compatible with both iOS and Android systems.
- Work with location-based apps, like Pokemon Go , Snapchat , Instagram , Facebook , etc.
3981454 people have downloaded it
If you have exhausted all of the tips that we have shared above and still the location is incorrect, you can try an alternative fix with our product, “Dr. Fone - Virtual Location”. With this, you can share a temporary or fake location with anyone without needing to do jailbreaking for your phone.
“Dr. Fone - Virtual Location” (https://drfone.wondershare.com/virtual-location-changer.html) allows you to share or use a fake location with your friends. You can use this application as a temporary fix for the incorrect location on your phone, security, or your location-based AR games or applications. Using this application is also easy and requires just a few steps. You can use this application by following the steps below.
- Step 1: Download the “Dr. Fone - Virtual Location” software on your laptop. Open and choose “Virtual Location”.
 safe & secure
- Step 2: You can then connect your phone to your computer and click on “Get Started”.

- Step 3: You will then be redirected to your current location on the new page.
- Step 4: If you want to change your location, you will need to turn on the “Teleportation” mode by clicking on the first icon and typing the location that you want then click on the “Go” icon.
- Step 5: Click on “Move Here” and your current location will show up as the location that you typed on Your Motorola Moto G34 5G.
You can watch the video below to fix your Motorola Moto G34 5G location with Wondershare Dr.Fone
Conclusion
There are the things that you can do when you have an incorrect location on your phone. If you ever encounter any issues with inaccurate locations in your Motorola Moto G34 5G, you can try all of the tips and fixes that we have shared in this article. You can also send a fake or spoof location to your friends in case you cannot get the incorrect location fixed immediately by using our product, “Dr.Fone - Virtual Location ”, one of the most safest and reliable tools for fake locations. You can ensure the privacy and safety of your location and your phone.
safe & secure
How to Use Life360 on Windows PC For Motorola Moto G34 5G?
Life360 is an online platform that utilizes geo-location services to help users share their real-time location with friends and family. The app allows people to create a family group and stay connected to each other through features like chatting, sharing location, sending safety alerts, etc.
As of now, you cannot run Life360 on computer as it is only available for Android and iOS. Why? Because as opposed to a PC, one can easily carry their device everywhere! It means whether your kid is stuck in traffic and needs your help or your parents have lost their way back home, Life360 will instantly send you an alert on your device.
However, that doesn’t mean you cannot use Life360 on a PC. While it may seem a bit odd, there are a couple of methods that’ll allow you to get the Life360 app for Windows. In today’s guide, we are going to share some of these methods that’ll help you run the Life360 app on Windows.
So, without wasting another second, let’s dive straight into the guide.
Part 1: Why people seek to use Life360 on PC?
First things first; why would anyone want to use a family locator app like Life360 on their PC? Well, the truth is everyone has their own reason to get Life360 for PC. For instance, let’s say you are in the middle of an important project and don’t want to be bothered by alerts on your smartphone. However, you still don’t want to compromise with the safety of your family members.
In this situation, you can simply run the Life360 app on PC. This will allow you to directly keep track of the whereabouts of family members on your Windows system and you won’t have to constantly check your phone.
Life360 can also be used on a computer when your phone’s battery has completely drained and there’s no power outlet nearby. In this case, you can simply power-on your laptop, start the Life360 app and send your current whereabouts to family members.
Part 2: Is it possible to use Life360 on Windows PC?
Life360 is an extremely useful app for people who are always concerned about their closed ones. The app is basically designed with a vision to keep family members connected and safe. In addition to location sharing, the app also provides exclusive features like crash detection, place alerts, speed alerts, battery monitoring, etc.
The app also makes it easier for parents to monitor their child’s movement. Using the app, you can always know that your kids have safely reached school and back home. For any parent, knowing whether the kids are safe, is one less thing to worry about.
However, as we mentioned earlier, Life360 hasn’t been released for Windows yet. So, there’s no direct way to install and run the app on a Windows PC. While Life360 may release a dedicated Windows software in the future, as of now, you can only run it using the alternative methods.
These methods include:
Part 3: Use Life360 on Windows PC with Android emulator
The first and the most convenient way to run Life360 on computer is to use an Android Emulator. An emulator is basically a software that creates a virtual Android system on your computer. As a result, you’ll be able to run Android apps on your computer.
While there are dozens of Android emulators, Bluestacks seems to be the most popular and user-friendly option among all. Unlike other emulators, Bluestacks is easy to set up and use.
Here’s how you can run Life360 on a computer using Bluestacks Android emulator./
Step 1: Head over to Bluestacks official website and tap the download button.
Step 2: Open the installer and tap the “download” button. This will initiate the download process on your System.
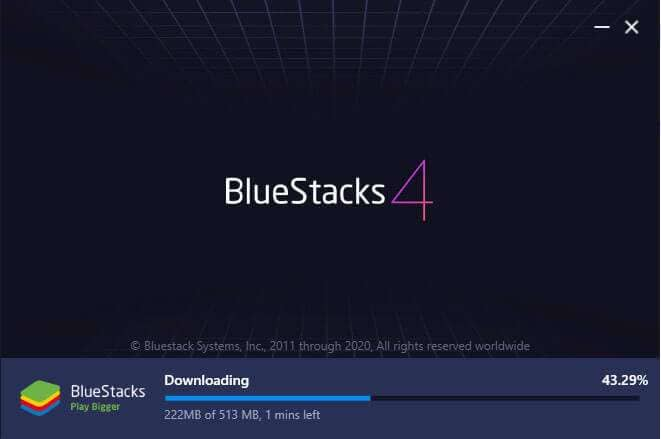
Step 3: Once the installation process completes, Bluestacks will start to boot. Keep in mind that the first boot may take some time, depending on your system configurations.

Step 4: In the home screen, tap the “Google Play Store” icon. You’ll be asked to sign-in with your Google account. Enter the right credentials and log-in to the Google Play Store.

Step 5: In the top search bar, type-in Life360 and tap the “install” button to download the app.

Step 6: Life360 is now installed on your computer. Open the app and enter your login details. You’ll now be able to run Life360 on your PC.

Part 4: Use Life360 by mirroring Android to Windows PC
While running an emulator is a great way to get Life360 on PC, it has its own set of challenges. For instance, running an Android emulator is not easy when you have a low-configuration PC. Emulators like Bluestacks requires high system configuration otherwise they take forever to load.
In this situation, we have another alternative for you to run Life360 on PC. You can simply mirror your Android to your Windows system. Mirroring the Android device will allow you to see its content on the PC itself.
Here’s how you can mirror the Android device on your PC.
Step 1: Make sure that Bluetooth is activated on both devices.
Step 2: On your Windows PC, open “Settings” and select the “Systems” tab.

Step 3: Choose the “Projecting to this PC” option in the left menu-bar and make sure that “Available Everywhere” is selected.

Step 4: If you’re running Android Pie or above on your device, scroll down to open notification drawer and select “Smart View” (or “Cast” in some devices). You’ll see your PC listed here. Tap the button to start Android mirroring.

Step 5: It may take some while for the connection to establish. Once it does, you’ll be able to cast your device screen onto your computer and you’ll be able to run life360 on your system.
Keep in mind that you’ll still require your device to navigate through the content on your computer. Any action that you perform on your device will be replicated on your computer screen as well.
Final Verdict
Life360 is probably among the top family locators for Android users. Apart from its extensive range of features, the app provides a user-friendly interface, which allows it easier for even elders to use the app without any issues. Even though there isn’t a dedicated Life360 software for Windows, you can follow the above-mentioned methods to run the Life360 on PC.
You Might Also Like
Location-based apps
GPS spoof for dating apps
GPS spoof for social apps
Pokemon Go on PC
AR game tricks

Change Phone GPS Location Easily
- ● Teleport GPS location to anywhere
- ● Play AR games without moving
- ● Spoof Location on the popular Apps
Also read:
- [Updated] Explore 5 Superior Ways to Record Sound with Windows 11
- [Updated] In 2024, Navigating the Complexities of PS4 Live Streaming and Recording
- [Updated] Unveiling Social Network Regulations Can You Share Videos?
- [Updated] Unveiling the Practicality of Smoothing In-Camera Jitters
- Capture and Convey Top 10 Image Writing Aid Apps (iOS/Android) for 2024
- Elite Selections Top-Rated Mac Video Recording Apps for 2024
- Enhancing Video Appeal 20 Premium Thumbnail Fonts for 2024
- How to Change your Realme GT 5 Pro Location on Twitter | Dr.fone
- How to Update iPhone XS Max without Losing Anything? | Dr.fone
- How To Upgrade or Downgrade iPhone 8? | Dr.fone
- How to use Device Manager to reinstall your hardware drivers in Windows 10 & 7
- How to watch AVCHD MTS video on Moto G Stylus (2023)?
- In 2024, Complete Tutorial to Use GPS Joystick to Fake GPS Location On Honor 90 Pro | Dr.fone
- In 2024, Mastering the Pause Button IPhone Slow Mo Techniques
- Kostenloze Online Converting of VIDEO_MOV in SWF-Format - PerfectSolution VideoConversion
- Possible solutions to restore deleted photos from Oppo Reno 9A.
- Possible solutions to restore deleted videos from Infinix Hot 40 Pro
- Recover your music after Google has been deleted
- Remove FRP Lock on 90 GT
- Title: In 2024, How to Share Location in Messenger On Motorola Moto G34 5G? | Dr.fone
- Author: Vivienne
- Created at : 2024-12-09 16:22:29
- Updated at : 2024-12-11 22:28:14
- Link: https://review-topics.techidaily.com/in-2024-how-to-share-location-in-messenger-on-motorola-moto-g34-5g-drfone-by-drfone-virtual-android/
- License: This work is licensed under CC BY-NC-SA 4.0.