
How to Wipe iPhone 15 Pro Data Permanently? | Stellar
How to Wipe iPhone Data Permanently?
Summary: Do you want to erase everything on your iPhone? But fear that it could be recovered. Learn about the best tool that wipes iPhone data permanently and makes it unrecoverable by any recovery software.

Your iPhone is a trove of personal data — photos, videos, passwords, ID proofs, bank details, chats, messages, contacts, and a lot more— which, naturally, you don’t want to fall into other hands. That’s why you prefer to delete all the information on your iPhone before selling it to others.
But several iPhone recovery software can easily restore deleted data from an old or discarded iPhone. So there’s always a fear that someone could recover your iPhone’s data and misuse it.
Here’s a solution — permanently wipe iPhone data beyond the scope of recovery by any software.
How do you permanently erase data from your iPhone?
Manual deletion is one of the ways to remove data. But it can be easily recovered by iPhone features like restoring ‘Recently Deleted’ or recovery software.
Then, Apple suggests resetting the content and settings of the iOS device. It’s effective as the deleted data is not accessible directly on your iPhone. But this also does not completely erase your data from iPhone storage.
So to wipe iPhones permanently, specialized erasure software should be used. The iPhone data erasure tool destroys all information on your storage by overwriting, thus rendering it unrecoverable.
Methods to erase everything on iPhone
- Reset content and settings on iPhone (data gets inaccessible but recoverable)
- Use iPhone data erasure software – Stellar Toolkit for iPhone (permanently wipes iPhone’s data, unrecoverable)

Method 1: Reset content and settings on iPhone
Apple provides a factory reset feature in iPhone with the ‘Erase All Content and Settings’ option. This method lets you bring your device to default settings by erasing iPhone data.
Apple’s factory reset will delete all settings, passcodes, photos, videos, notes, contacts, call history, messages, search history, app history, and other data on your iPhone.
However, erasing your iPhone with the ‘Erase All Content and Settings’ option does not delete your data permanently. All the personal data on iPhone is still recoverable with the help of advanced iPhone data recovery software.
Steps to Factory Reset iPhone:
- Open Settings on your iPhone.
- Tap and follow General > Reset.
- Tap on Erase All Content and Settings.
- A dialog box appears; click Erase Now.
- Enter your Passcode and your Apple ID password when prompted. This will wipe iPhone completely and turn off the device.
Now your device is ready to use as new without any personal photos, videos, or other information.
Note: Back up your iPhone data on iCloud or iTunes before performing a factory reset. Even when you want to sell the iPhone, the old data remains in iCloud and iTunes. And you can access it anytime on your computer or new iPhone.
Method 2: Erase data permanently using Stellar Toolkit for iPhone
When you want to delete iPhone data permanently beyond the scope of any recovery software, use an iPhone erasure tool – Stellar Toolkit for iPhone.
The factory reset option by Apple does leave a chance of iPhone data recovery by using the software. But, Stellar Toolkit for iPhone software permanently resets iPhone. The software erases iPhone data from the storage drive by overwriting and setting it to the original default settings. The software leaves no possibility of recovering data by any means.
You can quickly remove iPhone’s settings, photos, videos, audio, music, contacts, messages, chats, installed apps, call history, reminders, search history, and other data.
The software works with all iPhones and iPads. It can wipe off data from iPhone 15, 14, 14 Pro, 14 Pro Max, 13, 13 Pro, 13 Pro Max, 12, 12 Pro, 12 Pro Max, 11 Pro, 11, XS MAX, XS, XR, X, 8, 7, 7s, 6s, 6 Plus, 6, 5s, 5c, 5, 4s, and 4. It supports iOS 6.0 and up to iOS 16.x.
Stellar iPhone erasure lets you completely wipe data from an unlimited number of iPhones with the software.
Additionally, the Toolkit can also recover lost, or deleted data from iPhone, iCloud, and iTunes in various data lost cases such as water-damaged iPhones , broken iPhones , stuck at Apple logos , and so on.
Key benefits
- Wipes complete iPhone data permanently
- Erases data from multiple unique iPhones
- Easy-to-use
- Compatible with all iPhones and iPads
![]()
Steps to erase iPhone data permanently with software:
Step 1: Download and run Stellar Toolkit for iPhone on your computer.
Step 2: Select Erase Data.


Step 3: Erase the iPhone Data screen appears. Click Next.

Step 4: Plug your iPhone into the computer when prompted.

Step 5: Click Erase.
Step 6: An Erase Process dialog box appears. Select Yes to start the erasing process on iPhone. Next, you can view the process progress bar.

Step 7: Once the process finishes, the ‘Data Erase Completes’ message box appears. Click OK.
Your iPhone is now reset as new without any personal information, passwords, or settings.
When should you erase iPhone data with software?
Your data is sensitive and can be easily exploited by someone. So before giving away your iOS device to its next owner, it is better to wipe it off completely so that no one can recover it.
You can use iPhone erasure software when you are-
- Selling an old iPhone
- Exchanging an old iPhone with a new one
- Donating an iPhone to someone
- Fixing technical malfunctions in your iPhone
Final Words
Stellar Toolkit for iPhone comes to the rescue when you want to be sure about your iPhone data privacy.
If you have to use your iOS device as new, give it away, donate, or resell, you must use the erasure software to wipe iPhone data permanently. It’s 100% secure and easy to use.
![]()
A free trial is available for Stellar Toolkit for iPhone; you may try it yourself.
How to Recover FaceTime Call History on iPhone
Summary: Have you deleted or lost FaceTime calls from your iPhone? Once deleted from the call history, the Facetime calls are removed from the app’s history and vice versa. This post shares quick methods to restore FaceTime call history from any series of iPhone 15, 14, 13, 12, X, XS Max, XR, X, 8, 8 Plus, 7, and below versions and iPads’.


‘Just noticed, that the FaceTime call history suddenly disappeared. Cellular calls history is fine. I am using iOS 16.2, iPhone 14. I don’t have iTunes backup and don’t want to try iCloud backup as it will remove my current data. Is there any other way to get back FaceTime call history?’
‘I deleted the call history on my iPhone and without realizing that FaceTime calls will also be erased. How can I recover deleted FaceTime history?’
You love using FaceTime — Apple’s popular calling app, on your iOS device. It’s a free and easy way to connect with family and friends anywhere in the world through audio and video calls.
But what if ever you accidentally delete or lose FaceTime calls from your iPhone or iPad. They may be important calls you wanted to keep.
Since FaceTime calls are integrated into your recent calls list on iPhone, once deleted from the call history, the calls are removed from the app’s history as well and vice versa.
Here we share various methods to restore FaceTime call history on iPhone 14, 13, 12, 11, XS, XS Max, XR, X, 8, 8 Plus, 7, 7 Plus, 6 and below versions and iPad.
How to recover the lost or deleted FaceTime call history?
1. Restore FaceTime call history without iTunes/ iCloud backup
Deleted FaceTime history can be recovered by using Stellar Data Recovery for iPhone software. The software can restore lost FaceTime call history after accidental deletion, factory reset, app crash, jailbreak, and other issues.
The DIY software thoroughly scans your iPhone or iPad to recover the lost FaceTime call history.
In contrast to iTunes and iCloud backup, Stellar iPhone data recovery software lets you select and restore specific iPhone deleted call history along with the details like name, date, call duration, source country. This saves you from restoring other unnecessary data.
Step-by-step: Recover deleted/ lost FaceTime calls from iPhone
- Connect your iPhone to the computer
- Launch Stellar Data Recovery for iPhone
- Select Recover from iPhone on the left
- Select Contacts & Call Logs under What to Recover

- Click Next
- Preview and choose the FaceTime calls you want to restore from the list. Note: All the calls marked in red color are the deleted calls

- Click You can save the call history either on your computer or iPhone.
2. Recover FaceTime call history with iCloud
Stellar Data Recovery for iPhone can also restore FaceTime calls from iCloud backup on your iPhone or iPad. This method allows you to select and recover only the lost FaceTime call history from iCloud instead of restoring complete backup data.
Two methods to restore FaceTime log from iCloud:
- Restore lost/deleted FaceTime calls from iCloud without losing existing iPhone data
- Restore FaceTime call history from iCloud backup for free, deleting the current iPhone data
Method 1: Restore lost/deleted FaceTime calls from iCloud without losing existing iPhone data:
- Download Stellar Data Recovery for iPhone on your PC/ Mac
- Select Recover from iCloud Backup on main screen of software

- Select Contacts & Call Logs and click Next
- Enter the Apple ID and password. List of all available iCloud backup files appears. Select the relevant backup of your iPhone
- Click Scan

- Click Call History on the left window. Preview the existing and deleted FaceTime calls. Click Deep Scan, if you don’t find your required calls.

- Click Save to save the recovered call history either on iPhone or computer
Method 2: Restore FaceTime from iCloud backup for free (this deletes the current iPhone data)
- Go to Settings > General > Reset> Erase all Contents and Settings

- On Apps & Data screen, tap Restore from iCloud Backup


- Sign in to your iCloud account

- Choose the last backup and Restore
Note – The drawback of this method is that it deletes all your existing data from the iPhone.
Recover FaceTime calls from iTunes Backup
3. Recover FaceTime calls from iTunes Backup
FaceTime recovery from iTunes backup is also possible if you have enabled the backup in iTunes.
Restore FaceTime call log from iTunes either with the help of Stellar Data Recovery for iPhone or directly from your system without the help of software.
However, if you don’t want to part ways with your iPhone’s existing data and lose all the current photos, videos, etc. with the old backup file, take the help of Stellar Data Recovery for iPhone.
The software protects your current data on iPhone and recovers only the call history as required.
Two methods to restore FaceTime call history from iTunes
- Restore FaceTime call history from iTunes without losing existing iPhone data
- Restore FaceTime call history from iTunes backup, deleting the current iPhone data
Method 1: Restore FaceTime call history from iTunes without losing existing iPhone data
- Download Stellar Data Recovery for iPhone software on your PC/ Mac. Note: Connect your iPhone to a computer, if want to save the recovered FaceTime call history on iPhone.
- Select Recover from iTunes Backup on the main screen of the application.

- Select Contacts & Call Logs
- Click Next. From the list of the iTunes backup files, select the relevant iTunes backup

- Click Scan
- Click Call History. Preview the existing and deleted FaceTime calls. Click Deep Scan, if you don’t find your required calls.
- Click Save. You can save on your computer or iPhone
Method 2: Restore FaceTime call history from iTunes for free (this method deletes the current iPhone data)
- Connect iPhone to PC/ Mac
- Launch iTunes on your computer
- Select your iPhone under the Device list and choose the recent backup entry date

- Click Restore Backup
4. Contact Apple
Apple uses end-to-end encryption in FaceTime calls. It will not decrypt the content of your conversations. Apple may record and store information, such as to whom you had called and your iPhone/ iPad network configurations. It stores this information for up to 30 days. You don’t get the details like the content of the conversation or whether your call was answered or not.
Nevertheless, you can contact Apple requesting for FaceTime call logs by clicking on this link and submitting the request – Read More
Apple will get back to you.
Conclusion
iCloud and iTunes backup are the natural way for Apple users to recover FaceTime deleted call history. However, Apple’s solution though workable is not efficient when it comes to the recovery of specific types of data. The iTunes or iCloud backup recovery methods replace every existing data on your iPhone with an old/recent backup. You lose your current photos, videos, call history, messages, chats, etc.
Whereas Stellar Data Recovery for iPhone tackles this recovery issue more effectively. It recovers lost FaceTime calls and also keeps your current data intact on the iPhone.
The software works in all data loss situations due to deletion, jailbreak, water damage, factory reset, etc. You can restore FaceTime call history from any iPhone including series of iPhone 15, 14, 13, 12, 11, X, XS, XR, iPhone 8, iPhone 7, iPhone 6 and older versions. It is available for both Windows and macOS computers.
How to Fix & Retrieve Pictures/Videos From a Water Damaged iPhone That Won’t Turn on
Summary: Spilled water on your iPhone? This article guides you in detail, how to fix water-damaged iPhone and do’s to avoid further damage. Also learn ways to recover lost photos and videos when your iPhone is not turning on due to the damage.
| Q. I accidentally dropped my iPhone in swimming pool and now it does not turn on anymore. How can I fix my water damaged phone? Is there any way I can rec__over photos and videos from my water damaged iPhone
A. To fix a water damaged iPhone, try to dry it completely while to recover your lost photos and videos you have two options:
- Recover from Apple iCloud and iTunes backup
- If, backup files are not accessible or deleted, recover using third-party software
|
| — |
This article guides you in detail, how to fix such water-damaged iPhone and recover lost photos and videos when the device is not turning on.
The damage caused by water or any other liquid on iPhones is unpredictable. Your iPhone may or may not turn on and there is a high possibility of losing your data including photos and videos on it.
Even if your iPhone is under the one-year warranty, Apple does not cover liquid damages to iPhone. So now you are in a crazy situation of double loss, of owning a faulty device and losing precious photos and videos stored in it.
First, a piece of advice: Stay calm. Before trying to retrieve lost photos through any method follow the essential dos and don’ts to fix your iPhone and avoid further loss.
DOs fo****r Water Damaged iPhone
- **Try drying
**Remove excess water off the iPhone by rubbing it dry on a towel. Gently shake it to clear the water in the sockets and ports of the phone. - **Do not plug it in or turn it on
**Do not plug or turn on the wet iPhone as this can cause a short circuit. Even if it turns on, it will stop working forever after sometime. If the iPhone is in Power on or Sleep Mode, switch it off completely and leave it to dry for at least two days. - **Remove the SIM card
**Take out the SIM card from the iPhone to avoid damage to key components and rub it dry on a clean cotton cloth. - **Dry with silica gel sachets
**Use silica gel packets to dry your wet iPhone and leave it for at least 48 hours.
DON’Ts for Water Damaged iPhone
- Do not press any buttons of wet iPhone
- Do not try to switch on your iPhone to avoid short circuit
- Do not use a hairdryer or other drying tools to dry your phone
- Do not place your iPhone in raw rice to avoid foreign particles entering inside
After doing above essential hacks, once you power on your water damaged iPhone, there are two possibilities, either your phone starts working but you have lost your data or iPhone does not switch on at all!
Do not panic, as in either case, you can recover your lost photos and videos from a water damaged iPhone via two methods
Method 1: Recover from **iCloud and iTunes backup
**Apple has this remarkable feature in which all iPhone data is automatically saved in iCloud and iTunes backup. You just you need to sign in to iCloud or iTunes through your Apple ID on the new iOS device. Next, select and transfer the desired files to the new device from the list of available backups in iCloud/iTunes.
_**Method 2: Recover from third-party application
**_In case you are unable to restore photos from the iCloud and iTunes backup files or have deleted your desired files from the backup, opt for a third-party application to recover photos or videos from your water damaged iPhone.
From a plethora of iPhone data recovery software available in the market, experts recommend to pick only the trusted and secure data recovery tool, specially designed for the iOS device.
**Use iPhone Data Recovery Software by Stellar
**One of the commonly used third-party data recovery software is Stellar Data Recovery for iPhone. The easy-to-use interface and 100% safe download makes it a popular choice among iPhone users.
If your iPhone is synchronized with iCloud and iTunes backup, you can retrieve lost photos and videos from water damaged iPhone using Stellar Data Recovery for iPhone. In the situation when your iPhone is not detected by the system or do not switch on at all, after it is damaged due to water, the software offers two ways to recover photos and videos:
- Recovery from iCloud Backup
- Recovery from iTunes Backup
Step-by-step: Recovery from iCloud Backup
Step 1: Install and Run Stellar Data Recovery for iPhone and select “Recover from iCloud Backup” from the main menu.
Figure 1: Illustrates the main screen
Step 2: Enter the Apple ID and password to sign in to iCloud.
 Figure 2: Illustrates the credential screen
Step 3: After entering the credentials, the software displays the list of all backup files. Select the desired files and click Scan
Figure 4: Illustrates backup files list
Step 4: Preview the selected files and press Save. You can save recovered photos or videos at the desired location.

Figure 5: Illustrates the preview of the files
Step-by-step: Recovery from iTunes Backup
Step 1: Select “Recover from iTunes Backup” option on the main screen
Step 2: The software displays all iTunes backup files. From the Tree view, select the file categories from which you want to recover photos/videos. it will list all files under that category.

Figure 6: Illustrates the backup files list
Step 3: Preview the existing and/or deleted files

Figure 7: Illustrates the Preview of files under the selected category
Step 4: Click ‘Save’ to recover the file. You can either choose to save all or a few files by selecting the checkboxes.
_  Figure 8: Illustrates the file saving process_
**Conclusion
**The safest way to _rec_over lost photos and videos from water damaged iPhone is through a secure third-party tool.
The easy-to-use interface along with scanning and recovery precision makes iPhone Photo Recovery Software by Stellar most sought by iPhone users. It comes as a blessing, especially when the iTunes and iCloud backup files become inaccessible or unreadable.
Try the Free Demo Version of the software to recover your lost and deleted pictures/videos in Mac or in Windows.
How to Recover Deleted iPhone Camera Roll Photos and Photo Stream Pictures?
Your iPhone is not only a medium to connect but also serves as a personal repository for your priceless photos, videos, and music. However, in case your iPhone crashes or you lose files due to accidental deletion, your data stands at risk and may be lost forever. But with Stellar Data Recovery for iPhone, your data is here to stay. This professional solution helps to retrieve your lost or accidentally deleted photos, audio, as well as video files from Camera Roll, Photo Stream, and App Library. It also offers a complete recovery of your iPhone data such as Contacts, Messages along with attachments, Notes, Call History, Calendars, Safari Bookmarks, iTunes, and iCloud backup files.
An iPhone stands apart for its high image quality, among its other notable features. With several iPhone releases over the years, its camera specifications have improved indescribably, and this has increased the percentage of buyers to a considerable extent. Though it cannot be likened to a professional DSLR, yet it stands superior in its category.
How to recover your deleted iPhone Photos?
If your collection of photos, audios, and video files gets accidentally deleted or lost due to iOS crash, the question that comes to mind is whether they can be recovered. If you have created a backup already, then all you need to do is to restore data from the most recent backup. However, if you have not created a backup either on iTunes or iCloud, then the situation needs attention.
Your photos and other multimedia files are important to you. Therefore, it is important to look for an efficient and reliable recovery tool. Here, Stellar Data Recovery for iPhone serves as a perfect solution with its straight forward and user-centric interface. This tool accommodates all the major specifications of different iPhone versions.
The Process: Let’s look at how Stellar Data Recovery for iPhone recovers your lost or accidentally deleted photos from your iPhone:
Step 1) Download, Install, and Launch Stellar Data Recovery for iPhone on your system
Step 2) Next, select Recover from iPhone option from the three alternates provided on the home screen. Select what you want to recover and click “Next”.

Step 3) Now connect the iPhone device to your system for initiating further recovery process. Alternatively, the device can be connected before you launch the tool
Step 4) The iPhone photo recovery tool will start scanning the connected device. A message will then pop up on the screen which reads: “_Please wait! Scanning your iPhone._” It will appear along with the live progress generator.
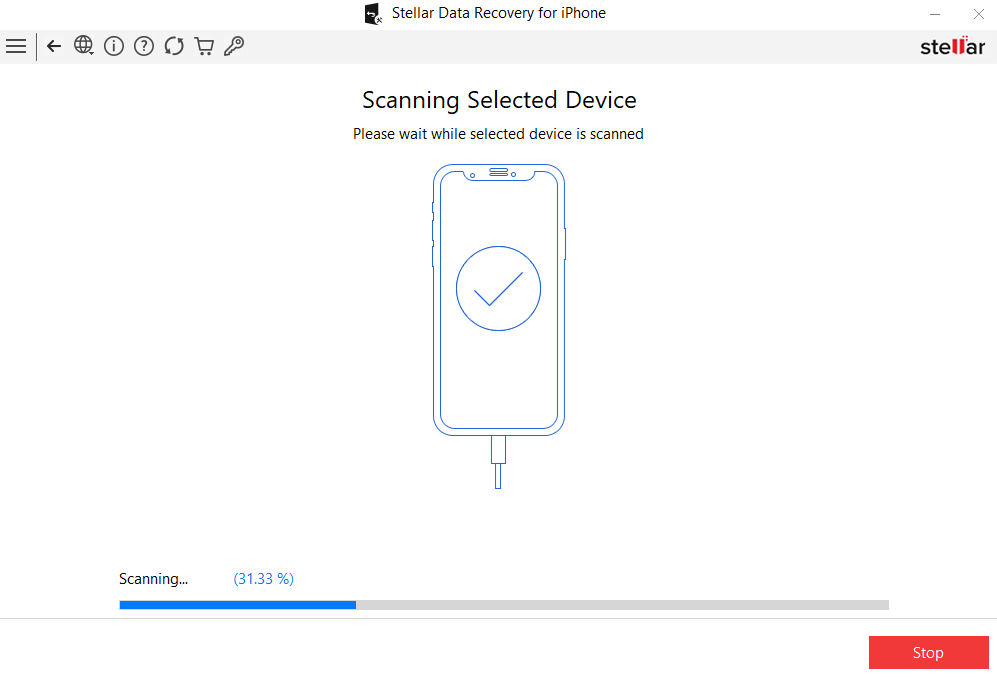
Note: Here, you can select to stop the scan process in between by selecting the Stop button
Step 5) Once the scanning is completed, the tool will enlist all the files and folders existing within the iPhone device.
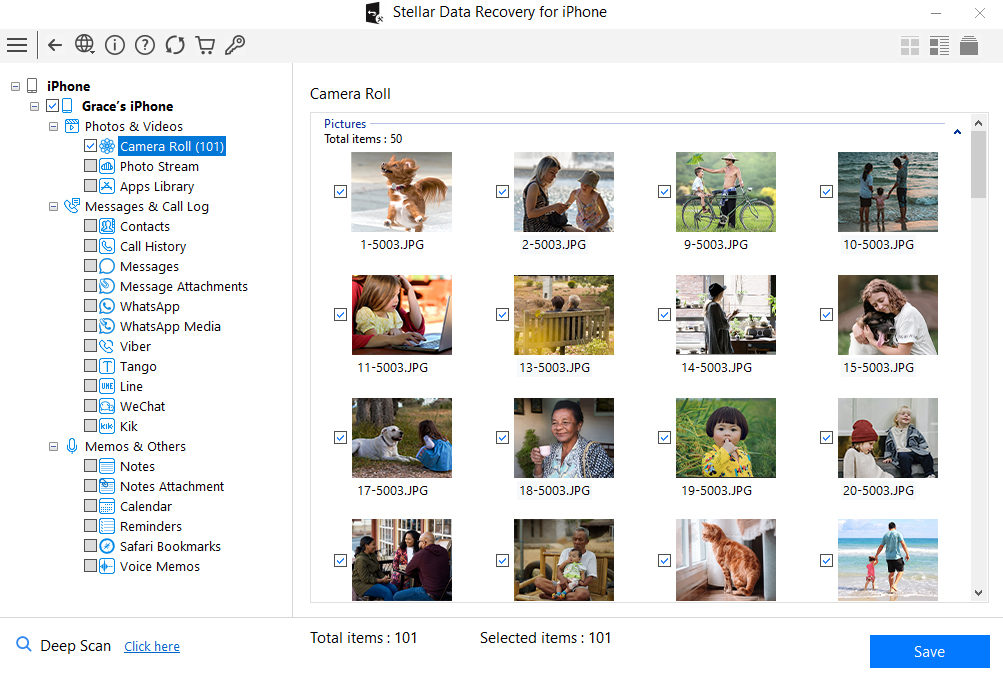
Step 6) From the left panel, you can select Photos & Videos category from the tree structure. It will then expand associated options that include Camera Roll, Photo Stream, and Apps Library.
Step 7) Select Camera Roll and Photo Stream and the tool will display all the items from these two folders in the middle pane
Step 8) Now from the middle pane, you can either select a single file for recovery, or you can select multiple items by checking the associated boxes
Step 9) Once you select all the items that you need to recover from Camera Roll and Photo Stream, click on Save button
Step 10) The Save Files window will appear. Click on Browse and provide the location for storing the recovered data on the hard drive. Else use, the default location provided by the software which is Desktop << iPhone Default Name.
Step 11) Click OK to proceed saving the recovered files.
Step 12) Exit from the tool and go to the selected location to access the Camera Roll and Photo Stream recovered pictures.
Stellar Data Recovery for iPhone also restores data from the following:
- If you are looking to recover data from your iPhone backup such as iTunes backup or iCloud backup, then you need to select Recover from iTunes backup or Recover from iCloud backup options. The tool also allows importing files from Windows and Mac machines to iPhones.
- After the scan is completed, the tool will display all integrated components of deleted iTunes backup or iCloud backup files within its panel from where it can be selected as per priority and preferences. The powerful algorithms are fully advanced to recover every single bit of data.
- The tool also recovers encrypted iOS iTunes backup files and restores it back to the device. You can also recover lost or deleted data from iPad using the iPhone Data Recovery tool. Backup files of small, medium and large scale are handled effectively by the tool.
- The tool also recovers bookmarks deleted accidentally from your iPhone default browser Safari. Since bookmarks hold information about useful links and websites, this feature can be very helpful for technically savvy users.
- Title: How to Wipe iPhone 15 Pro Data Permanently? | Stellar
- Author: Vivienne
- Created at : 2024-07-17 03:47:25
- Updated at : 2024-07-18 03:47:25
- Link: https://review-topics.techidaily.com/how-to-wipe-iphone-15-pro-data-permanently-stellar-by-stellar-data-recovery-ios-iphone-data-recovery/
- License: This work is licensed under CC BY-NC-SA 4.0.