
Does find my friends work on Xiaomi Redmi 12 5G | Dr.fone
 ## Does find my friends work on Xiaomi Redmi 12 5G
Find my friends app is becoming a norm for most people. The Smartphone and app developers are now aware of this. As a result, most Smartphone platforms are adding tools that allow users to share their whereabouts with others. Apple has its native Find my friends for their iPhone. The app works great for a group of iOS users, but you may need to share location with Android devices, which the built-in app can’t help you with. When you want to use the “find friends” app, they certainly need to add people from Android and iPhone users. And, you can’t dictate what people are choosing as their smartphone platform. While some prefer Android, many of us are dedicated to the iPhone too. Therefore, if you need to keep track of the real-time location of your family members or friends, you need the assistance of a third-party tool. These apps are the most logical way to create a link to find my friends app for Android and iPhone.
1.1 Tracking Friends using iPhone
As an Apple user, you might already know about the “Find my friends” app on your device. It is the most convenient way to share your location with your friends. You can also keep track of your peers with it. If you ever feel lost in a new area, you can use this app to notify your friends. You can use this app to create a route for all to meet in a selected location. If your friends are heading toward the destination, the app will notify you.
Let’s see how one can use the “find my friends” on the iPhone, shall we?
1.1.1 You will find the “Find Friend” on your Home screen. In IOS 13, you will have to launch the “Find MY” app.

1.1.3 Add a contact name from your list. You can add several contacts here.
1.1.4 Tap Send.

1.1.5 Now select a time option.
If you want to share your location, launch the app first. Then Tap “Me.” Then, keep your “Share My Location” switched on.

1.2 Tracking Friends Using Android
Android users can also use this find my friends app. Even if someone in your group does not use a smartphone (seriously?), you can track them. You can send an invite, and if they agree, you can find your friend anytime. Remember, iPhone or Android, whatever the platform, all the members of the group have to agree with location sharing; otherwise, you cannot track them.
You can use find my friends from iPhone to an android user via Google Maps. You need to download the app and activate location service by taping “Allow While Using App” Then you have to select” “Share your location” You can then send your location to your android user friend from the message icon of the Google map.

You have the preliminary idea of how one can find their friends using an iPhone or Android. But, how to keep track of all of your friends, while some of them are die-hard apple fanatics and others are android geeks? Well, you do not need to tell others about those anymore, as we are going to talk about three fabulous cross-platform apps for finding friends.
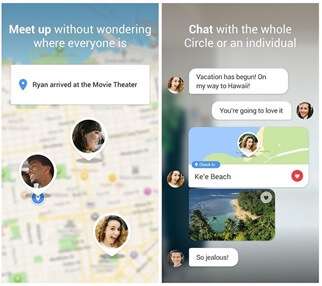
This app is straightforward and pretty simple to use. You can look at the map and find your friends at any time. Your friends also can keep track of you. SO, if security is your concern,” “Find my friend” is perfect for you. You can also chat with friends while they are on route.
You can also issue an alert to your friends whenever you are in an emergency. All your loved ones will get the address details, current time, and the remaining battery life. If your group has a mix of Android, iOS, and Blackberry, this app is excellent for you.

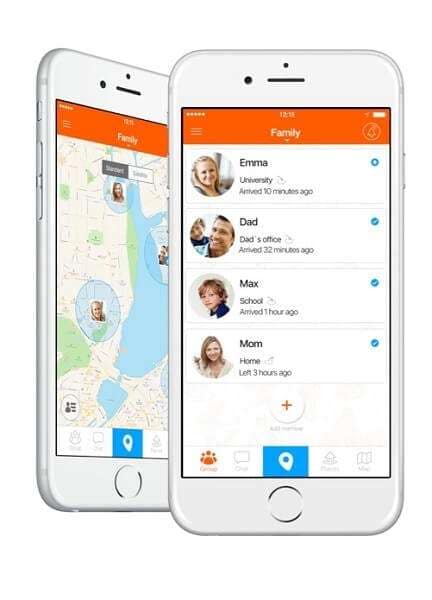
Familo is the best working “finding friend” app. The app is regularly updated, and you can sign up with a phone number. You don’t need Facebook or any username to use this app. You have to create a group and invite others. If they sign up, you will get their location details at any time of the day. Of course, they have to approve it first!
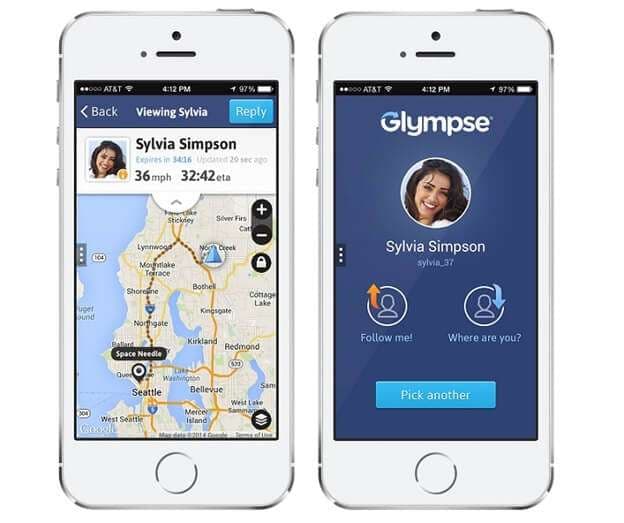
2.3 Glympse
What makes Glympse different from others is the fact that you don’t even need to sign up here! You can set up a group for a specific time, and share your location to anyone you want to. You can even share your places via the web. If you wish to track your friends temporarily or contact someone for a specific period, Glympse is the right choice for you. And, if someone is not comfortable with the idea of location sharing, you can send your location via the web. They can use the shared link to know your area without ever installing the app. But, if you want to check up on your loved ones continually, then Glympse cannot satisfy your demand. As a temporary service, your location sharing link will be activated for four hours at most.
Conclusion
Remember, there are several other find my friends apps in the app store, which can entice you. Some of them have pretty neat features. But, they can drain your battery too fast; others can be pretty limited on their free version. And, many of find my friends apps are partial to either iPhone or Android. But, why not try them out yourself? Everybody’s needs and tastes are different. Give my three favorite find my friend apps for Android and iPhone a try, if they suit you, great. If not, there are more options. Find one for you and keep a “leash” on your loved ones!
4 Feasible Ways to Fake Location on Facebook For your Xiaomi Redmi 12 5G
There are many reasons to fake location on Facebook. For example, you may want to hide your ideal address and protect your safety. Also, you might want to change the Facebook location to get better search results for products, friends, groups, and so on. But whichever the case, creating a fake GPS on Facebook is relatively easy. So, in this post, I want to introduce you to several methods to spoof your Facebook location quickly and easily.
Method 1: Spoof Facebook Location on Computer
You can easily fake your Facebook location by spoofing the town or city in the profile settings. This way, anyone who views your profile bio will see your new Facebook location.
So, without wasting much time, here’s how to spoof Facebook location on PC:
Step 1. Launch the Facebook app on your web browser and tap your profile icon.
Step 2. Here, click Edit details under the Intro section. After that, you’ll land on the Posts window by default.
Step 3. Now tap the Pencil icon to change the current city/town. You can also change your hometown, relationship status, and when you joined Facebook.
Step 4. Finally, tap the Save button, and Facebook will automatically update your current location. To see if the changes have been applied, tap the About tab to see your new profile.

Note: Although you can successfully change your bio, Facebook will still access your actual location. Now this means your Facebook recommendations and adverts will still be based on your locality. So, keep reading to learn other reliable ways to spoof your Facebook location.
Unlike the strict iPhones, Android allows you to install a third-party app to change the GPS location of your device and Facebook, to be precise. This means you don’t need to fork out some serious money for a VPN service. So, in this section, you’ll learn to fake a Facebook location on Android using the Fake GPS location app. It is a free program for teleporting your phone IP address to new places with a simple screen tap. Let’s see how to do that:
Step 1. Install and launch the Fake GPS location app on Android.
Step 2. Next, “allow mock locations” in your Android’s developer settings. To do that, open Settings >Additional Settings >Developer options. Then, click “Select mock location app“ before choosing Fake GPS.

Step 3. Now go to the Fake GPS location app and choose a new location for your device. If satisfied, tap Ok to save the added area you’d like your device to appear on.
Step 4. Finally, head to Facebook and change your location settings.
Sometimes you might want to prank your Facebook friends with a new location announcement. In other words, you can make them believe that you’re in a particular location when in reality, you’re not. In that case, the Facebook Check-In feature will come in handy. It’s a simple but highly effective feature that adds your fake location to a Facebook post. Just think of it as a status update.
So, below is how to fake location on Facebook with the Check-In feature:
Step 1. Open Facebook on your favorite browser and tap the “What’s on your mind“ field.
Step 2. Next, tap the GPS icon. You’ll see all the locations near you. Or, key in a fake address and select it on the suggestions.

Step 3. Now write whatever is on your mind and add the location to your latest post. It’s that easy!
Method 4: Fake Location for Facebook’s Nearby Friends via a Tool
While signing up on Facebook, you’ll be requested to allow the platform access to your actual GPS location. This will enable Facebook to correctly tailor adverts, friends, and other recommendations based on your location. But unfortunately, it can be challenging to change the actual location unless you’re willing to spend top dollar on a VPN service. Put, you’ll need to spoof your IP address to change the exact location.
For this reason, I recommend using a fake location tool like Dr.Fone - Virtual Location . It’s an all-in-one software that provides multiple solutions for your Xiaomi Redmi 12 5G or Android phone. It allows you to teleport your current location to anywhere in the world without jailbreaking your Xiaomi Redmi 12 5G or spending top dollar on a VPN service. This lets you take full advantage of the “Nearby Friends” Facebook feature that needs your actual GPS location.
Below are the key features:
- Transfer phone location to any place in the world.
- Intuitive and detailed zoom-in and zoom-out map.
- Compatible with all iOS and Android versions.
- Move to new locations on the map via different routes and means.
- Compatible with location-based apps like Telegram, Facebook, Twitter, etc.
Here is a video tutorial for you to learn and preview how to fake location on Facebook via Dr.Fone - Virtual Location
 safe & secure
Step 1. Download and open Dr.Fone.

Install and run Dr.Fone on your Mac or Windows PC and then connect your phone to your computer using a USB cable. After that, select the file transfer option on your phone and then tap Virtual Location on Dr.Fone.
Step 2. Connect your phone to the software.

Step 3. Choose a location and start moving.


See, you don’t need an expensive VPN service to fake your GPS location on Facebook convincingly. With Dr.Fone, you can easily change your Xiaomi Redmi 12 5G or iPhone location, which will immediately reflect on apps like Facebook, Google Maps, Telegram, and so on. And guess what? There are a host of other phone management features to exploit. You should try it!
safe & secure
Snapchat users are very fond of using custom filters when sharing content on the app. It is a great way to ensure that your images and videos are only viewed by the people that you target. However, a new feature called Geo-filters has brought a lot of mixed feelings amongst Snachatters.
The filter is location-based, which makes any content that you share to be seen by people who are within your geographic fence.
Imagine that you are standing at the Niagara Falls and want to share with people who are in Europe; you will not be able to do this and this is why the filters are problematic to people in the Snapchat community.
Thankfully, there are ways in which you can spoof our device, allowing you to access Geofilters anywhere in the world. Today, you learn several ways in which you can achieve this objective with ease.
Snapchat comes with a lot of filters, both sponsored and crowdsourced, which you can use to interact with different people. When Geofilters was introduced, it meant that you could only access filters that were designed for specific locations.
Sponsored filters generally tend to target people in certain areas, and this can limit how you disseminate your content on Snapchat.
The main benefit that you get from faking Snapchat is getting access to these filters without even moving an inch.
When you spoof your device, Snapchat thinks that you are actually in the area that you have spoofed to. This virtual location will then allow you to access the filters that are available in that area.
One of the best ways to fake Snapchat without jailbreak is to use XCode. This is an app on your Xiaomi Redmi 12 5G that allows you to tweak certain aspects of the apps that you have on your device, including Snapchat.
Get XCode on your device and then launch it. Start by using the locations that are found to setup XCode. You can download XCode from Apple App Store. You will need your Apple ID and password to use XCode.

Step 1: Start by creating a basic single-view application
Launch XCode and then create a new project
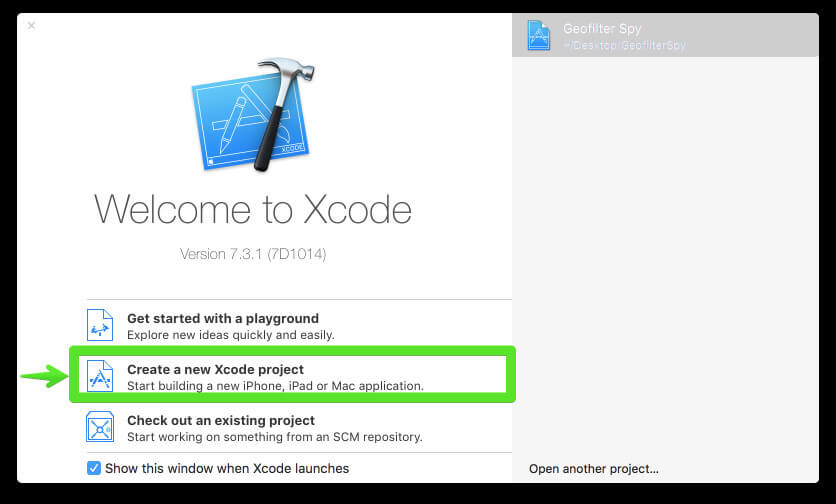
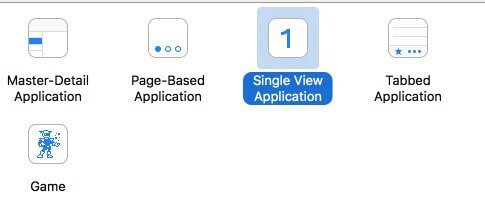

Now proceed and customize the Organization Name and the Identifier. The identifier works like a reverse domain name so you can use anything you desire.
Proceed and select swift as your preferred language and then click on “iPhone” as your device so the app will be small.
Any other options below this should be left in their default states.
Now go ahead and save the project to a location on your computer. Since the version control does not apply in this case, make sure that you uncheck the option before you save the app.

Step 2: transfer and run the created app on your iOS device
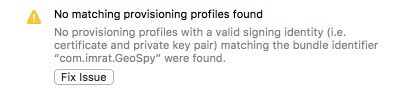
People who do not have the latest version of XCode will run into the error shown below.
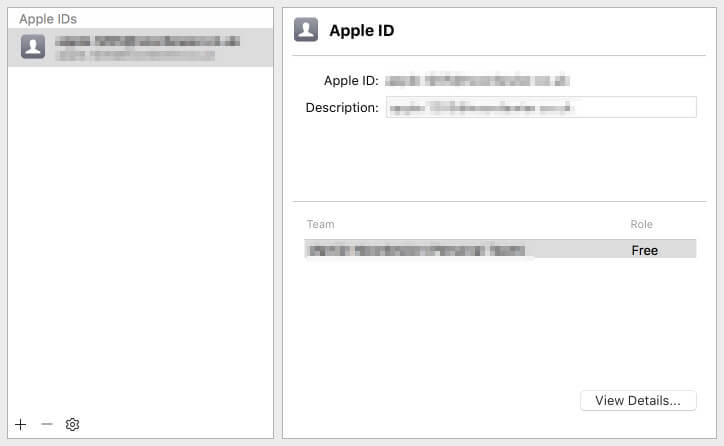
- Access the preferences on your XCode
- Choose the accounts tab
- Click on the add (+) icon at the bottom left side of your screen
- Now choose “Add Apple ID”.
- Type in your Apple ID and password
You should now have an accounts screen similar to the one shown in the image below.
Now you can go ahead and click on the “Fix Issue” button.
Now the error will be resolved and you should have a screen that is similar to the image below.
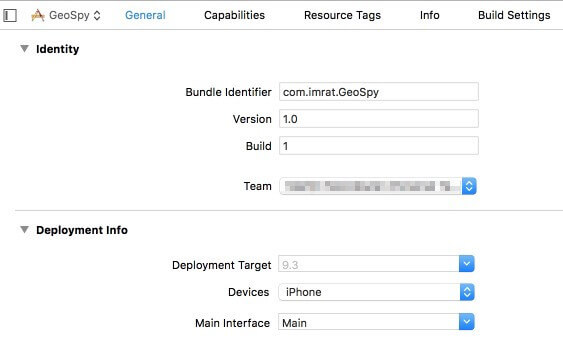
You may now run the app that you created before on your iOS device.
Use an original USB cable to connect the iOS device to your computer.
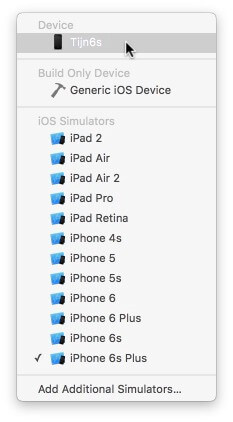
Towards the top right-hand corner of your screen, click on the button that is displaying your project name and then click on the iOS device.

Now your iOS device will be showing at the top. Select it and proceed.
Wait for the process to be complete. You might as well get a cup of coffee as this can take quite a while.

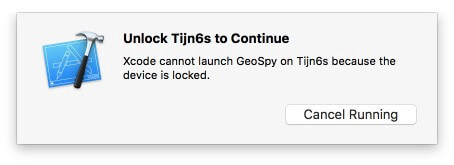
When the process is complete, XCode will install the app on your iOS device. You will get the following error if your device has not been unlocked; unlocking the iOS device will put off the error message.
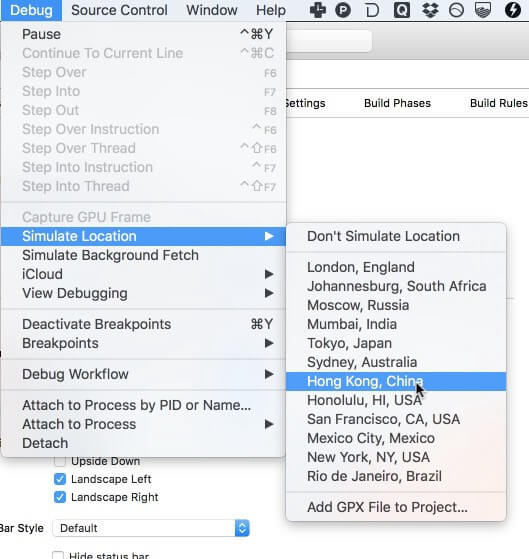
Step 3: It’s time to spoof your location
Go to Google Maps or iOS maps which will now show your current location.
Go to XCode and then choose “Simulate Location” from the “Debug” menu and then select a different location to test.
If you have done all that you need to do, then the location of your iOS device should instantly jump to the location that you have chosen.
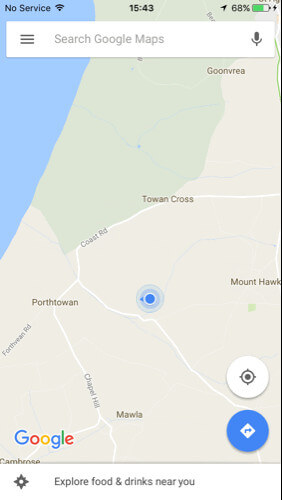
Now you can proceed and see if you have access to Geo-filters in the new location.
Step 4: Spy Geo-Filters on Snapchat
Now you can launch Snapchat and then access the filters in the area that you have teleported to. Remember that you can move from one location to the next on XCode without having to close Snapchat. Just cancel the current snap after changing the location and create a new snap to see the filters in the new location. If this fails to respond, then go back to Google maps or iOS map app and then ensure that you are in the desired location. Once you have done so, close Snapchat and restart it again, and you will be in the new location once more.
Part 3: A paid but easy way to fake Snapchat location without jailbreak
You can also fake your Snapchat GPS location using a premium app such as iTools. This is a popular application, used to spoof many other apps that require geo-location data to work. Another point to note is that the latest iPhone models cannot be jailbroken. The iOS version today is very secure and you cannot tweak it like before.
Thankfully, you can use a premium, not free, iTools to change your virtual location without jailbreaking the Xiaomi Redmi 12 5G device. You can get iTools on a trial basis, but after the period expires, you will have to pay $30.95 to continue using it.
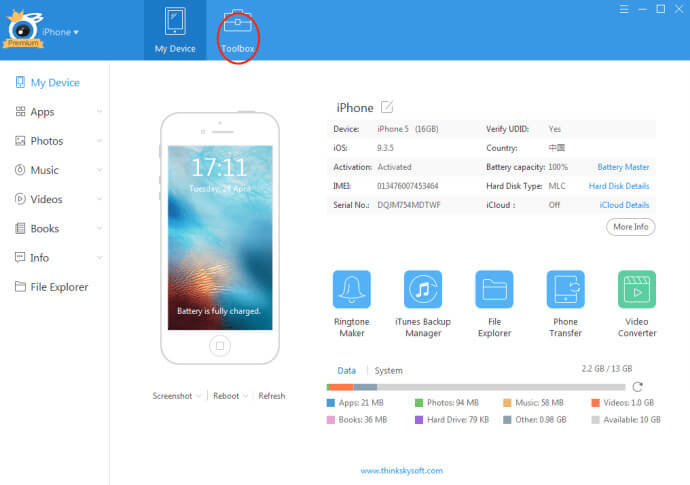
Step 1: Download and install iTools on your computer and then launch it. Connect your iOS device to your computer using the original USB cable that came with the Xiaomi Redmi 12 5G device.
Step 2: Go to the iTools panel and click on “toolbox”.
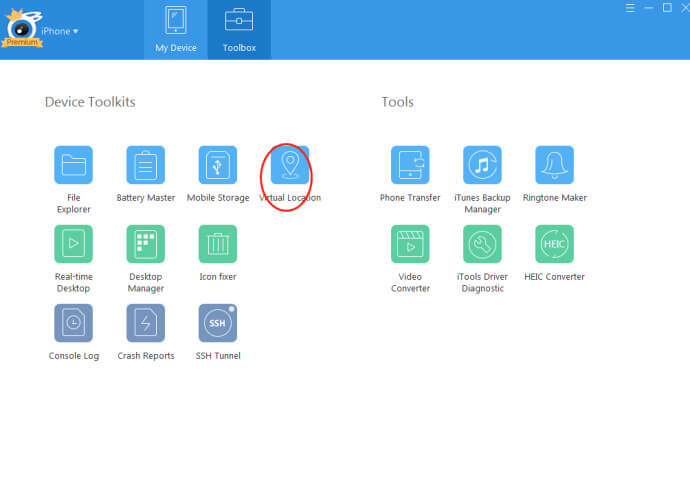
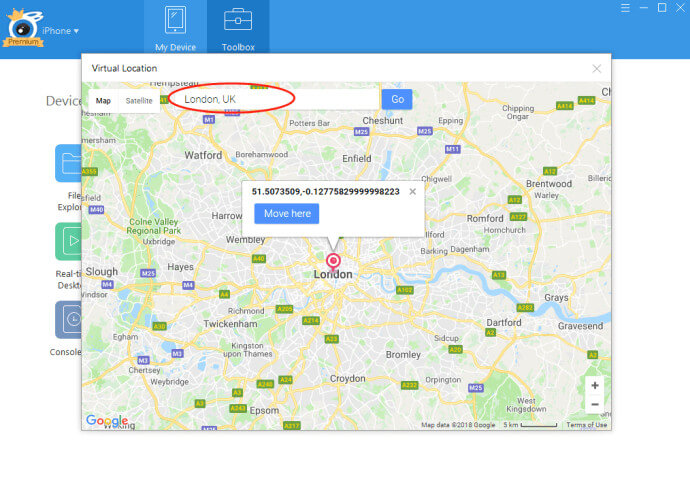
Step 4: Type in the location that you want to teleport to and then click on ‘Move Here”.
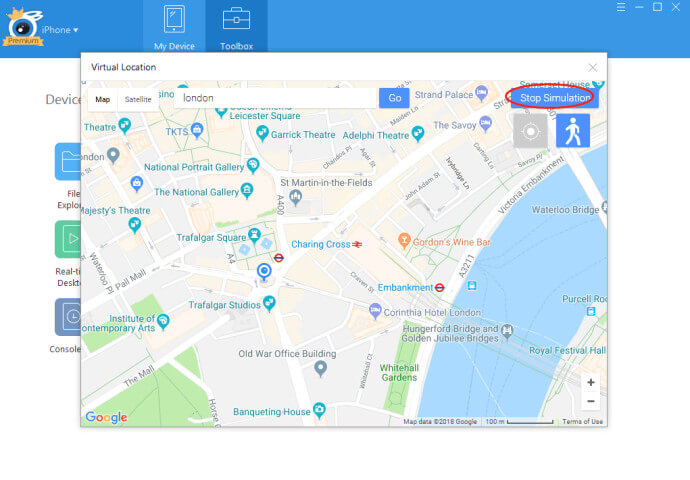
Once you are finished with this spoofed location, you can simply select “Stop Simulation” in iTools. This is a premium tool, but very simple to use. It is the best tool to use, especially if you are having a device with the latest iOS version.
From the steps used in both methods, it is very clear that iTools is the best app to use to fake your Snapchat GPS location for several reasons. Here are some of them:
- Ease of use - Using XCode to fake your Snapchat GPS location is a long and complicated process, whereas using iTools is simple and clean.
- Price – Although XCode is free while iTools is not, the benefits of using iTools surpass the cost. This makes it less-costly when it comes to performance and convenience.
- Security – XCode may not be very secure, especially when it comes to avoiding detection by Snapchat. You may have to keep going back to XCode, and changing the location, switching off Snapchat, and restating it again. However, when using iTools, your location is fixed until you stop the simulation.
- Versatility – XCode cannot be used on the latest iOS devices without posing problems, while iTools is a simple and effective tool for all iOS versions.
In conclusion
When you want to spoof Snapchat to access Geo-Filters in any part of the world, you can use the complicated XCode or pay a fee and use the simpler iTools. There are various benefits that you gain from teleporting using these tools, with Geo-Filters access being the biggest benefit. If you want to use Snapchat all over the world without moving out of your home, then these are the ways that you can go about it.
- Title: Does find my friends work on Xiaomi Redmi 12 5G | Dr.fone
- Author: Vivienne
- Created at : 2024-09-07 09:03:04
- Updated at : 2024-09-08 09:03:04
- Link: https://review-topics.techidaily.com/does-find-my-friends-work-on-xiaomi-redmi-12-5g-drfone-by-drfone-virtual-android/
- License: This work is licensed under CC BY-NC-SA 4.0.